
ClearlyIP’s Tips and Tricks
Basic SIP Debugging
In one of our previous tips and tricks articles, we mentioned one of the coolest things about our phones and it is the ability to take SIP traces (or pcaps).
With this tool, we can capture the SIP packets flowing inside the device, and determine the root cause of any issue.
In this article, we would like to talk about how to start debugging SIP packets. Although it is very important to read and understand all the available documentation about the protocol, in this case, we would like to show you a yet simple but powerful tip: When debugging any SIP trace, first, make sure that all the fundamental “steps” are displayed in the traces.
Basically, a SIP call involves the following steps (or methods)
- INVITE
- 100/180 Trying
- 200 OK
- ACK
- BYE
- 200 OK
Below is an image showing the process of extension A calling extension B.
As you can see, all the SIP Methods are involved.
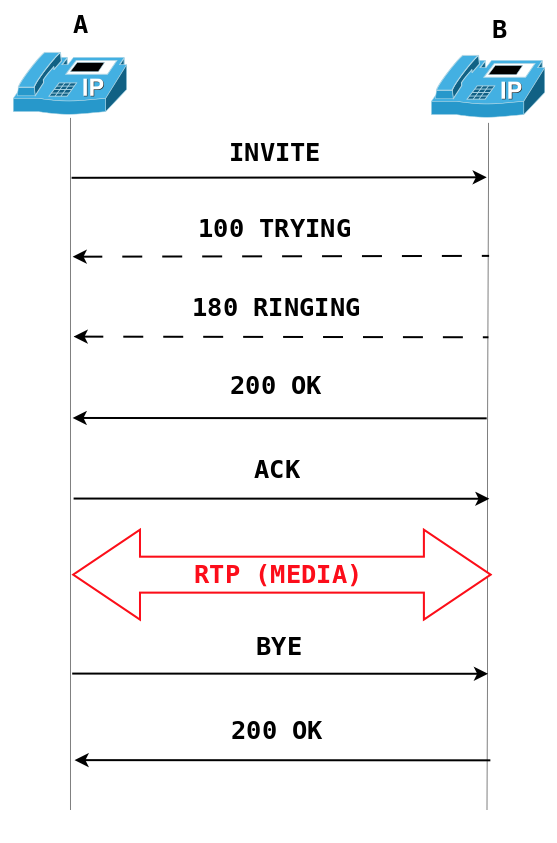
If any of these methods is missing, our calls will not be connected or completed successfully.
For example, when a user mentions “the calls are connected, audio flows both ways, but after 30 seconds they are disconnected”, one reason for this could be that the ACK Method is missing or is not being received in one leg of the call.
Below is an example of a call that after it is connected, point 1 is not aware of the ACK sent by the PBX ( point 2). After some time, point 1 resends a 200 OK message to the PBX and when a timeout is due, the call is terminated because point 1 thinks point 2 is gone.
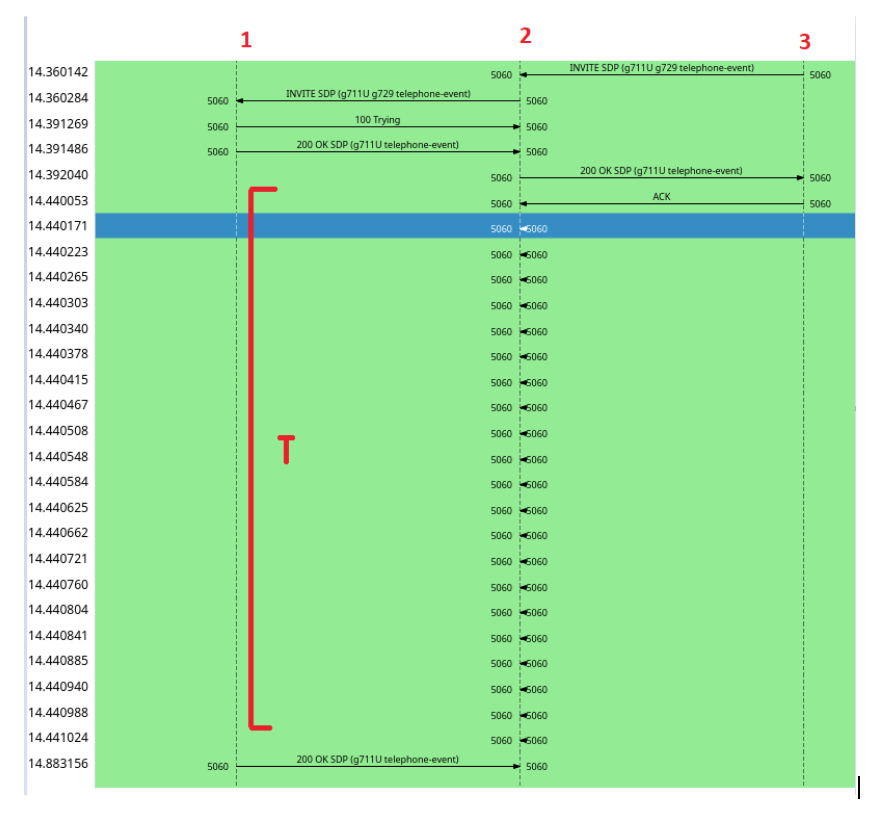
As you can see, all the previous methods (INVITE, 100 TRYING, 200 OK) are flowing correctly among the 3 points, but if one is missing (ACK) the call is terminated.
So, as mentioned above, when it comes to SIP debugging the first thing to do is check all the Methods are properly sent between endpoints.